As promised, here are some better (more visual) instructions on how to make the 2,4,6,8 Candy Bag from our recent MEGA event! I was just going to post a picture of the template but thought to myself... why not try a picture tutorial and show the making of the bag from beginning to end. WOW! Now I know why I don't do these tutorial very much - they take some time to create, edit and publish BUT I hope it is all worth it because I love these bags and I'm very thankful that you come by to see me by way of my Blog!!

You'll start with a piece of 8 1/2 x 11 cardstock and cut it into 2 equal 1/2's (8 1/2 '' x 5 1/2 '')
Then, you'll need to score as shown below at 2'' then 4'' then 6'' then 8'' - if you have an 'arm' on your cutter, you'll be able to use it when you get to the final scores!
Flip the cardstock lengthwise and score at 2''
Here's the visual. The dotted lines are score lines and the solid lines are where you cut
I tend to stamp my cardstock before cutting - its a bit easier that way
Here's what the cut & scored version should look like
Next, you'll want to start taping. TIP - using the picture above as reference, start taping on the right side where I've folded the first flap up a bit.
Work your way across, taping all squares of the base one-by-one until you get to the last square and small flap piece. Tape well - putting some tape on the flap piece also. The flap will fit inside to secure the box.
Fill with candy/snacks/chocolate - whatever you want! TIP - only fill about 1/2 way as you'll need some space at the top of the bag to finish.
Fold in sides so that the front of the bag wall and the back of the bag wall meet evenly. Apply some tape on the insides of the front/back walls to secure the bag. The will help when you go to thread your ribbon.
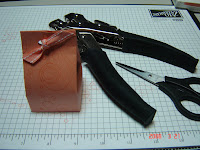
Using your crop-a-dial, punch 2 holes for the ribbon. The crop-a-dial works so well in this case because you're punching thru several layers of cardstock.
Using coordinating ribbon, thread through holes and decorate the rest of the bag as you wish (tags or sayings).
That's it - you're done! I hope you enjoyed this tutorial and that you come back to visit often :o)


No comments:
Post a Comment